Friday, March 5, 2010

Sinanju painting -3- Custom decals and sleeves

The decalset from samueldecal was a bit sparse, so I made some decals myself. Scanned the original decals from the Sinanju and traced the ones I needed in and filled in black.
Then printed them out on Laser decal paper. (cost like 2€ for an A4 sheet). Worked out great.

Below the decals I made (left) the samueldecal Sinanju set (bottom right) and a generic warning decal set in 1/144 from samuel - I prefer 1/144 decals on 1/100 kits, looks more to scale then man-sized warning decals that 1/100 ones are :)


For the sleeves I primed the plastic with black canned lacquer first, the sprayed Alclad2 Pale Gold over it.

Then I sprayed Revell flat black email color over it.

Then I wiped off the raised areas with lighter fluid and cotton buds. Worked out great but Alclad comes off easier than you'd think -_-
Have to redo a bunch of parts, but generally it works great.

Tuesday, March 2, 2010

Pics that don't suck - aka Jagd Doga - Quess part2

Tried to make pictures that don't totally suck and the Jagd Doga was the guinea pig. The lighting still leaves a lot to be desired but I have a pretty good idea how to make things better next time.


http://www.flickr.com/photos/40088241@N03/sets/72157623416584173/

*sold*

Monday, March 1, 2010

Sinanju painting -2-

As usual I used Tamiya acrylic paints for painting.
To paint the Sinanju yellow i primed the parts with cheapo Duplicolor canned primer, sprayed Mr. Hobby White Base over it and then Tamiya flat yellow. The white was so i get a more vibrant yellow. It works with directly spraying over the gray primer, but then it takes around 4 layers of yellow to get a good result. Over the flat yellow followed a clearcoat so that I can apply decals.

For the bazookas I used Tamiya Nato Black, which has a bit of a grayish tint... also i had that color left over :)

For the internals I am using Mr Metal Color Iron - buffable paint. After airbrushing you buff it a bit to get a great metal effect - which doesn't really photography that well.


As for the ornaments... my current plan is to paint the gold first (Alcald2 Pale Gold) and the spray email black over it. After it dries i wipe the raised gold parts free. Not sure if it will work, heh.


The sheer amount of parts is a bit annoying to paint, but at least, as mentioned before, the parts breakdown is good and most nubs parting-lines are hidden. So there aren't many putty sessions needed.

Friday, February 26, 2010

Good News Everyone! SP-14 on 3/21

Plamo Tsukurou CUSTOM SP-14 will air on 3/21 and feature two military kits:

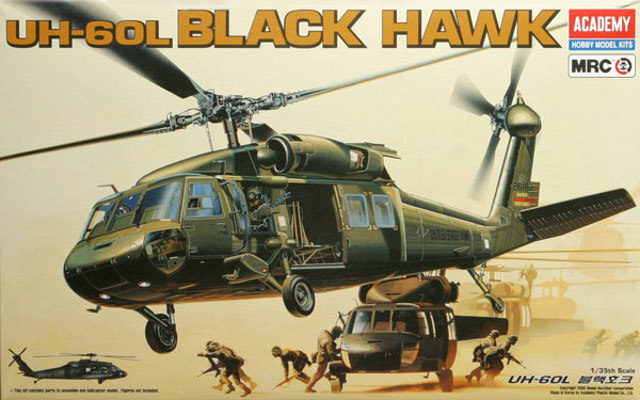
An Academy UH-60L Black Hawk and a Tamiya JGSDF Light Armored Vehicle

Tuesday, February 23, 2010

Sinanju painting -1-

After watching the amazing Gundam Unicorn OAV episode 1 I was really motivated to continue working on the Sinanju :) - And with the Qubeley finished (pics to follow) I started working on the S.

Started with the backpack:

After a round of primer:

Overall the parts breakdown is really good and should make it easy to paint.
Over the gray I'm planning to spray a layer of white as I'm not sure if the yellow or orange (that I am planning to paint the Sinanju with) is strong enough to cover the gray...

Also got these sanding stick at a local hobby store for ~12Euro

totally worth the investment, really useful when working with resin. Recommended!

Friday, February 19, 2010

HGUC Hy-Gogg part 2

Crammed out that Hy-Gogg. Hah!
Painted some parts in Tamiya Royal Blue and gave it a shark mouth, those always looked insanely cool to me :)


The blue paint looks a bit messy below, i think thats from the fumes of the white paint as I used white primer out of a can... yeah.


Need a bit of cleanup now and I'll probably add a black outline around it.

All this I did while listening to Tegan and Sara which are pretty cool!

Sunday, February 14, 2010

Qubeley progress again 2

So I have been rather busy lately, but I managed to squeeze in some Q work this weekend.

Started with painting the Bits in silver, following the advice someone posted in the comments about thinning the (pre thinned!) Vallejo Air color with water. This worked pretty well after thinning it about 3:2 ~ 2:1, but it was still a bit bothersome to clean out of the airbrush. I would have used alcad, but it's too cold for that to spray at the moment.


Used the Vallejo Steel as base color and painted the rest with Yellow, Gunmetal & Smoke as well as black sumi-ire.

Turned out pretty good, but I forgot to paint one of the bits -_-;

Also started masking and painting the reaming flaps and internals.
Some blurry pics